Water damage can wreak havoc on a home or business, but proper drying techniques can make all the difference in preventing mold growth, structural deterioration, and costly repairs. Whether it’s a small leak or a major flood, the right approach to drying ensures that moisture is completely removed, protecting both the building and its occupants.
So, how do professionals dry out a water-damaged space efficiently? What methods and tools are used to ensure thorough restoration? Let’s discuss the top drying techniques used in water damage restoration and why they matter.
Water Damage Restoration
Water damage restoration is the process of cleaning, drying, and repairing areas affected by water intrusion to prevent further damage and health hazards. Whether caused by flooding, plumbing leaks, or natural disasters, water damage can weaken structures, promote mold growth, and ruin belongings. The restoration process typically includes water extraction, dehumidification, sanitization, and structural repairs. Professionals use advanced equipment such as pumps, air movers, and moisture detectors to ensure thorough drying and prevent long-term issues. Quick action is crucial to minimize damage and restore the affected space efficiently, making professional water damage restoration essential for maintaining a safe and habitable environment.
Why Proper Drying is Essential
Before diving into the techniques, let’s understand why thorough drying is crucial in water damage restoration.
Risks of Incomplete Drying:
🔹 Mold Growth – Mold can begin developing within 24-48 hours of water exposure.
🔹 Structural Damage – Excess moisture weakens wood, drywall, and flooring over time.
🔹 Electrical Hazards – Hidden moisture in walls or wiring can create a fire risk.
🔹 Musty Odors – Lingering dampness leads to unpleasant smells that are hard to remove.
🔹 Decreased Property Value – Unresolved water damage can lead to expensive repairs and lower resale value.
1. Water Extraction: The First Step in Drying
Before drying can be done, standing water must be removed. In Addition The faster this step is completed, the easier the drying process will be.
Common Water Extraction Methods:
Submersible Pumps – Used in severe flooding to remove large volumes of water quickly.
Truck-Mounted or Portable Extractors – These powerful vacuums pull out excess water from carpets, flooring, and upholstery.
Wet/Dry Vacuums – Useful for smaller areas with minimal water buildup.
Expert Tip: The longer water sits, the deeper it soaks into materials. Water extraction should be done immediately to speed up the drying process.
Read More: Cleanroom Standards
2. Air Movement: Speeding Up Evaporation
Moreover Once excess water is removed, the next step is to increase airflow to accelerate drying.
How Air Movement Helps:
✔ Encourages Evaporation – Moving air pulls moisture from wet surfaces into the air.
✔ Prevents Mold Growth – Constant airflow prevents damp conditions where mold thrives.
✔ Dries Hidden Areas – Fans reach behind walls, under floors, and inside crawl spaces.
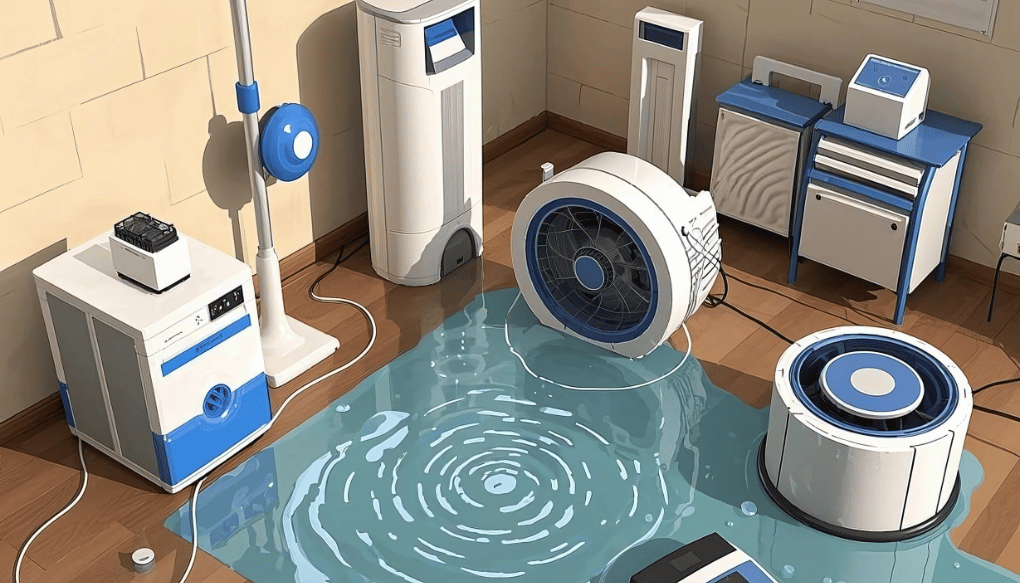
Types of Air Movers Used:
Axial Fans – Move large volumes of air and are great for drying rooms quickly.
Centrifugal Fans – More powerful and direct airflow toward specific wet areas.
Wall Cavity Drying Systems – Inject warm, dry air into wall spaces to remove hidden moisture.
Expert Tip: Position fans at a 45-degree angle toward walls and wet surfaces to maximize airflow and efficiency.
3. Dehumidification: Removing Moisture from the Air
Even after water is extracted and fans are running, humidity levels can remain high. However Dehumidifiers help remove excess moisture from the air, ensuring surfaces dry completely.
Types of Dehumidifiers Used:
Refrigerant Dehumidifiers – Work like air conditioners, condensing moisture from the air into water.
Desiccant Dehumidifiers – Use chemicals like silica gel to absorb moisture, effective in colder environments.
Low-Grain Refrigerants (LGRs) – Advanced models that extract more moisture than standard dehumidifiers.
Expert Tip: The ideal humidity level for drying is between 30-50%. Anything above this can prolong drying and encourage mold growth.
4. Heat Drying: Boosting the Drying Process
However Warm air holds more moisture, so increasing the temperature helps speed up evaporation.
Common Heat Drying Methods:
✔ Portable Heaters – Used to warm up affected areas and accelerate drying.
✔ Heat Drying Trailers – Industrial-scale heating units for large water-damaged spaces.
✔ Thermal Imaging – Helps identify moisture pockets that require more heat exposure.
Expert Tip: By Heat drying works best when combined with dehumidifiers to remove the extra moisture released into the air.
5. Specialty Drying Techniques for Hard-to-Reach Areas
Some areas—like behind walls, under flooring, and inside ceilings—are difficult to dry with standard methods. That’s where specialty drying systems come in.
Advanced Drying Methods:
Injectidry System – Also Forces dry air into wall cavities, ceilings, and hardwood floors using tubes and vacuums.
Floor Mat Drying Systems – Also Designed for hardwood floors, these mats pull moisture up through small suction holes.
Cavity Drying Equipment – Moreover Uses hoses inserted into walls to dry insulation and framing.
Expert Tip: Removing baseboards and drilling small ventilation holes can improve air circulation behind walls, speeding up drying.
6. Monitoring and Adjusting the Drying Process
Drying isn’t a one-time process it also needs constant monitoring to ensure moisture levels are dropping effectively.
How Professionals Track Drying Progress:
✔ Moisture Meters – It Also Measure moisture content in walls, floors, and furniture.
✔ Hygrometers – Whereas Track humidity levels in the air.
✔ Infrared Cameras – However Detect hidden water pockets behind walls and ceilings.
How Long Does the Drying Process Take?
Moreover the drying timeline depends on factors like the extent of damage, humidity levels, and materials affected.
General Drying Estimates:
Small Leaks (e.g., under a sink): 24-48 hours
Moderate Damage (e.g., wet drywall, carpets): 3-5 days
Severe Flooding (e.g., multiple rooms affected): 7+ days
Expert Tip: If drying takes longer than expected, it’s a sign that hidden moisture may still be present, requiring further assessment.
Final Thoughts: Effective Drying Prevents Future Problems
Water damage is a serious issue, but proper drying techniques can prevent long-term damage and costly repairs. Whether you’re dealing with a minor leak or a major flood, the right combination of air movement, dehumidification. For those in need of expert water damage restoration in Colleyville, TX, TheDryGuy.com offers reliable and efficient services to restore your property with professional care.
Key Takeaways:
Immediate water extraction is also crucial to prevent deeper damage.
Air movers increase evaporation and speed up drying.
Dehumidifiers reduce humidity and prevent mold growth.
Heat drying enhances evaporation, especially in colder areas.
Specialty drying methods help in hard-to-reach spaces.
Constant monitoring ensures thorough drying and prevents hidden moisture issues.
By following these professional drying techniques, you can ensure that your water-damaged property is restored safely, efficiently, and effectively.
Have you experienced water damage before? What drying techniques worked best for you? Let’s discuss in the comments!
Apart from that, if you are interested to know about “Choosing the Right Wood Components for Your Furniture Project” then visit our “Home Improvement” category.